The materials
Some of the parts are casted out of PU resin. For this purpose you have to make molds. I have a 3d printer so i can easely design and print the mols. So a 3d printer would be very convenient. What materials are needed:
- 2 x sheet metal disks
- copper wire
- 24 x magnets
- 1 x steel shaft
- 2 x ball bearings
total 15.00
The rotor:
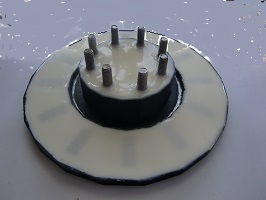
With the help of a friend i obtained 2 sheetmetal disks, water jet cutted. These disks have to be connected together with metal parts in order to conduct the magnetic fields from one disk to the other. This is why 12 screws are used.
Next i designed and 3d- printed a mold for the positioning of the magnets on the disks. I fitted the mold on the disk and glued the carefully cleaned magnets in place. I removed the mold and used it to fit the magnets on the other disk the same way.
The magnets polarity should alternately differ from each other so that each time a pair of magnets passes the coil, the magnetic field is turned.
Once the magnets are in place and everything checked, the magnets can be casted in so that they are firmly fixed on the disks. For this purpose i printed some mold parts that i could glue on the disks.
Next i casted the pu into the molds as such that the magnets are covered with about 1mm resin. After hardening some sanding is needed to get the surface completely flat.
In one of the disks i created the possibility to screw 3 bolts in. When mounting the alternator these bolts wil prevent the magnet disks snapping hard together, which might cause damage to the stator. They wil also help with the disassembly, we can screw the magnet disks away from each other.
For questions you can mail to hansiart@upcmail.nl
The stator:
The stator is elementary a disk containing the coils, in this case 9 coils. Because of the limited availability of magnets, i could only buy relative small magnets. Therefor the rotor has to be as thin as possible. A thick stator would mean that the magnets are further away from each other thus the magnetic field would be weaker. So very flat coils are needed.
For the coils i printed a coil winder with a widt of 4mm. It allows me to have cords in the coil that can be used to keep the coils in the shape they are wound. The winding is real munks job. First i have to assemble the winder with the cords in it. Then the copper wire is wound. Now the cords can be used to bind the coil. After removing the coil from the winder it can be fixed with glue and tape. The coils have 35 double windings of coperwire. This makes every coil as it were a double coil so (i hope) double efficient.
Next i printed a mold for the stator. This is made in a way that the coils can be placed in there right positions and casted with pu resin.
Now i made the electrical connections. The coils are 3 by 3 put in series as such that coil 1, 4 and 7 are connected etc. Also the direction of the windings sould be the same.
Next i could cast the mold with PU resin until the coils are slightly covered with resin. After hardening some sanding is done in order to make the stator completely flat.
The propeller:
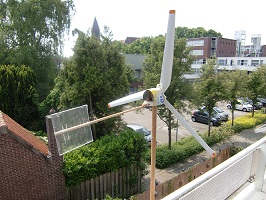
The blades for the prop can easely be made out of a piece of pvc pipe. The instructions for that can be found on the internet.
I decided to test these blades by building a prototype with the help of an old steppermotor from an inkjetprinter. With the coils in series it can produce about 12 volt ac.
I printed molds for the casting of the necessary parts and soldered a board with a rectifier and a regulator to get 3.3Volt to feed an ESP8266. This ESP should be able to provide information on the windspeeds.
So far i couldn't really test it because of the lack of stronger wind. The prop turns already in just a little wind but that is not enough to get the 3,3Volt out of the rectifier.
Conclusion
Now that we have electricity, what to do with it. First thing is rectify the alternating current to DC. This could be fed to a "grid tie invertor". If the yield is worth to do this. We can also connect an esp and make that count the revolutions and display this on a webpage or send it to domoticz. This way we cam measure windspeed. All and all a nice experiment but without economic value.


